Tuesday, May 6, 2014

chill out OR watermelon agua fresca

It's been one of those days. 
We are busy!  Going, going, going from one activity to the next.  Add in school and playing with friends and cleaning the house and making dinner and doing laundry...things get crazy.  The kids start to push each other's buttons and my patience begins to wear thing.  Then a refreshing idea comes to me...agua fresca. 

"Who wants a treat?" I shout to the girls.  "Yay!"they shout back, instantly forgetting about arguing.
 We head to the car and are on our way to Rancho Market for our favorite agua frescas.  I love the strawberry and the girls prefer the watermelon.  As we sip the fruity drinks, all the troubles of the day seem to wash away.  Sometimes we splurge and get warm, homeade churros- but usually we are all too busy sipping from our straws to think about anything else! 


I recently made this delicious drink for our Cinco De Mayo party, and it was so easy I know we'll be making this all summer long.  Now I need to search a strawberry recipe.  Thanks to Our Best Bites for the yummage recipe!


Watermelon Agua Fresca
Recipe by Our Best Bites

Ingredients:
4 generous cups of cubed watermelon (seeded, if not using a seedless watermelon)
1 1/2 cups cold water
Juice of 2 limes
Mint sprigs
Honey, agave, or simple syrup*
*I use simple syrup made of 1 cup water mixed with 1 cup sugar. If desired, you can add a small handful of mint leaves or a halved jalapeƱo. Bring to a boil, stirring occasionally, then allow to cool and remove any solids.

Instructions:
Place watermelon and water in a blender and blend for about 30 seconds. Strain through a fine-mesh strainer. Add lime juice and sweeten to taste with honey, agave, or simple syrup. Serve over ice with mint sprigs. Makes 4-6 servings.

Monday, January 13, 2014

Sister's cooking day OR freezer-meals-a-plenty

We pooled the ingredients.
We chopped. 
And diced.
And boiled water.
And sauted.
And roasted.
And baked.
And chopped some more.
Then we assembled, divided and packaged.


It's sister's cooking day at my sister Brynn's new place.  She has plenty of new kitchen space and was so kind to let us all hang there all afternoon to make freezer meals! Between my three sisters and mom, we were making meals for 5 families.


The kids played, the guys hung out and the gals cooked!  
We made Lasagna Roll-ups, two stir fry mixes (one veggie, one steak), Ham Fried Rice, Chile Verde, granola bars and Chicken Strips.  Whew!  We were all pretty tired out after a big afternoon of cooking marathon. 
I loved coming home and having my freezer full with easy meals!


*     *     *     *     *     *     *     *

A few tips for having a successful freezer meal cooking day- by yourself or with some sisters:

--Divide and Conquer.  Choose the meals to make and then divide up the ingredients, so everyone is bringing something.  If it's something they already have on hand, even better!  My sister-in-law Erica had a bunch of homemade marinara sauce for our Lasanga roll-ups- yummage!  Also, divide up the work.  We had some people chopping veggies while others were readying the pasta.

--Boxes and Bags.  We divided the stir fry into freezer bags for each family.  Don't forget to label what is inside each bag!  Have plenty of tin foil and plastic wrap on hand.  I like to seal a glass dish with plastic, then foil over the top for maximum protection in the freezer.  The aluminum tins with lids from the dollar store are also great for things like the lasagna or meatballs.  Plasticware, like Gladware, works well for stews and soups.  Oh- Label, label, label!  I promise you won't remember what the meal is when it's been in your freezer for a few months!

--Choose a few.  I always go overboard on this.  Really, choosing 3 or 4 meals is plenty.  

--Vary similar ingredients.  We made Stir Fry mix and Chile Verde- but both have onions, celery and peppers.  Similar ingredients but two different, and delicious, dishes for the freezer.  It's nice to have some variety with your meals. 

*     *     *     *     *     *     *     *     *    

There are a million places to find yummy freezer meals.  Some of you may be aware of a small site called Pinterest.  No?  Hmmm, check it out.  ;)
Some meals are tailored to crock-pots or lunches or breakfast or family size.  
I found this LIST on Six Sisters Stuff a while back and have enjoyed the simple meals.  

I usually just make double of a few meals a week to freeze for the next week.  A few of my families favorites, Chile Verde for example, is easy to make in huge batches and freeze.  As long as you are using it up within a few months!  Don't stock that freezer and let it go bad!  That's like throwing away money!  To help remember to rotate, I like to plan one or two freezer meals a week.  Working them into your existing meal plan is a break for you and ensures that they will still taste as yummage as they should.  Then when the freezer is getting low- it's time for another marathon freezer day!

Friday, January 10, 2014

scones revisited

I know, I know- I've already posted about our family's favorite scones.  But since I made a huge batch the other day (some for the freezer!), we have been having scones and tea in the afternoon. 
 It's so cozy!  Especially on a snowy afternoon like today.  
We just snuggle up on the couch with our treat and a few books, cover up with a quilt and we are set.


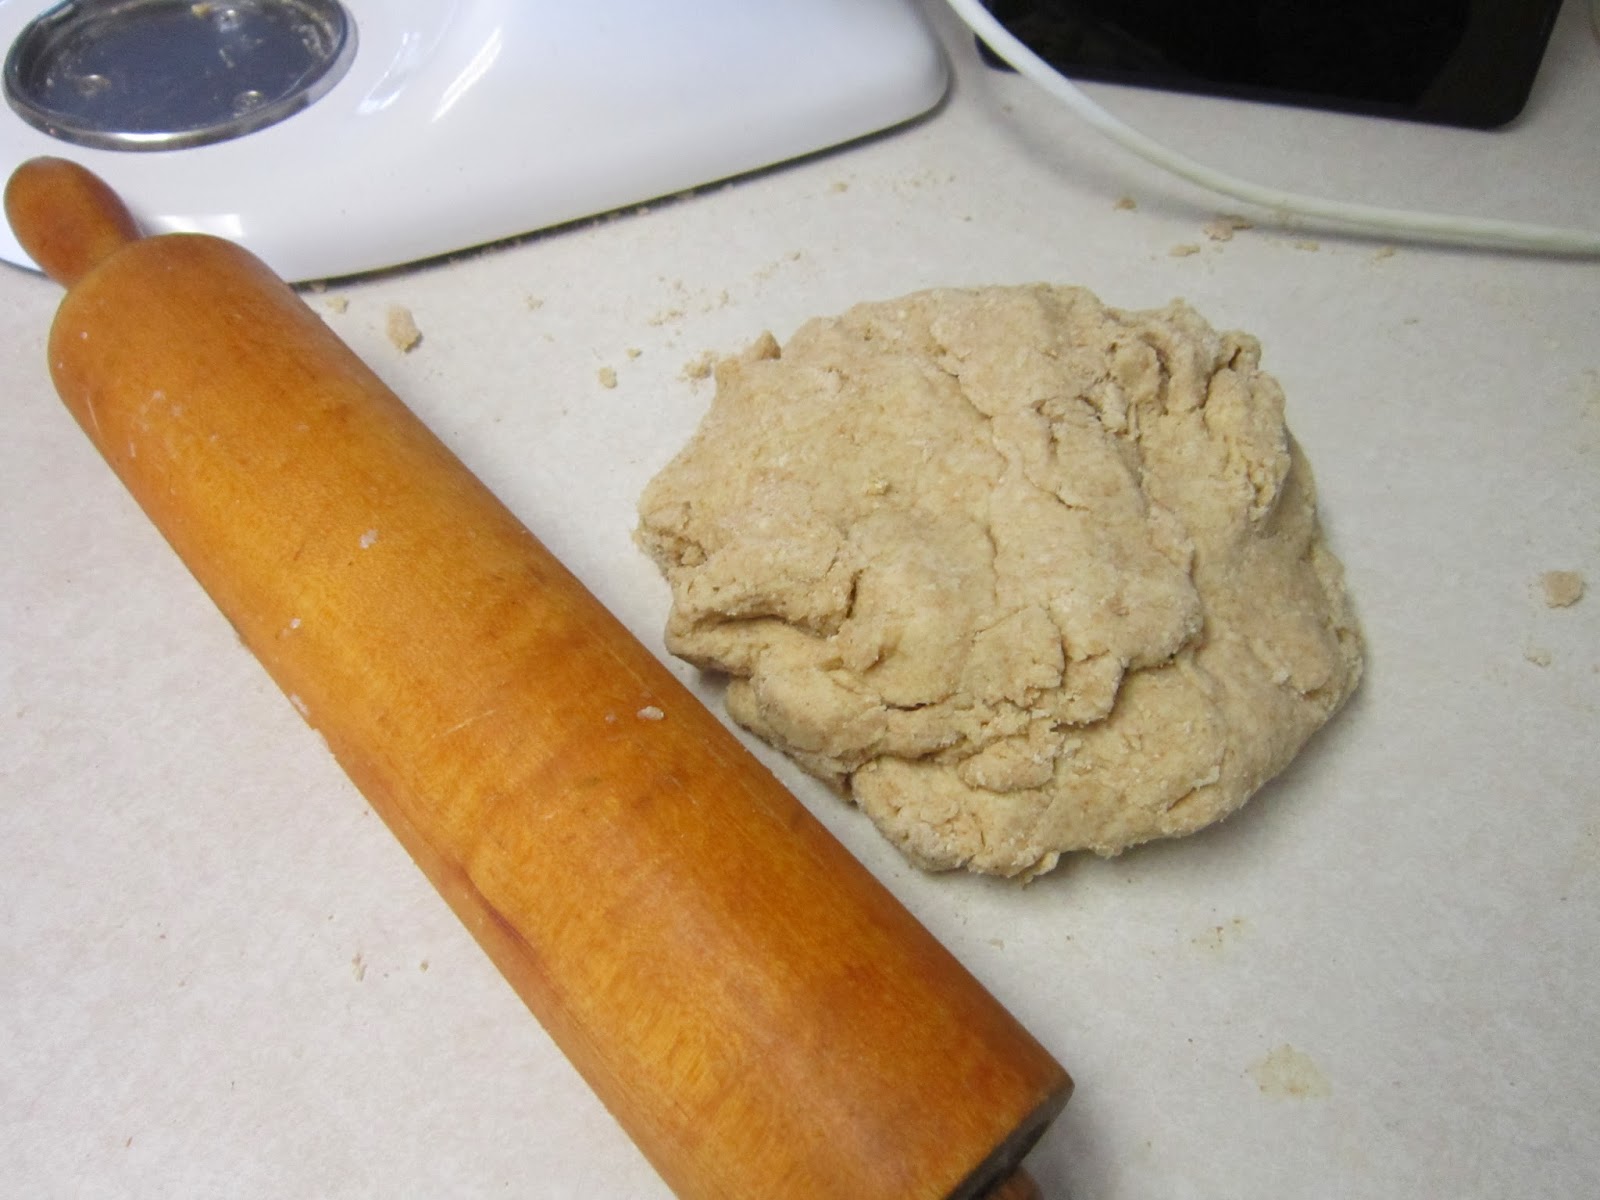
 Don't have any scones in your freezer ready to heat?  It's ok- it only takes a few minutes to mix the dough and then your house will smell heavenly and warm while they are baking.  My girls like to help my roll out the dough.  Enjoy!


Wednesday, January 8, 2014

Nana's House OR Ebelskivers

I remember walking through the thrift store and spotting the treasure...an abelskiever pan!  
Who would give this away?  I though to myself.  What a find!  
As I held that pan, memories of breakfast at my Nana's house rushed in.  
Her big table with all the cousins and aunts and uncles around it.  
Homemade syrups in cut glass decanters.  
Jars of varied homemade jams with little spoons for serving.  
Big platters of fruit with Nana's silver tongs.  
And piles and piles of these little abelskievers- hot and crisp.


Abelskivers or ebelskivers?  Not sure.
I am sure of the taste.  
Light and fluffy with a hint of jam hidden in the middle.  
Just like Nana makes.

Abelskievers are a tradition in our family.  On Sunday morning conference, New Years day and any other big holiday brunch- they are the coveted item.  Is it because of the childhood nostalgia that ties them to my tastebuds?  Or is it because I rarely make them at home for my own family so they seem like a special treat?  They are simple as pancakes to whip up, so my New Year's resolution is to eat these at least 6 times in 2014!


Ebelskievers
  • 3 large eggs
  • 2 tablespoons granulated sugar
  • 3 cups buttermilk
  • 1 teaspoon vanilla
  • 1/4 cup plus 2 tablespoons vegetable or canola oil
  • 3 cups flour
  • 1 1/2 teaspoons baking soda
  • 1/2 teaspoon baking powder
  • 1/2 teaspoon salt
Directions
  1. In a large bowl, whisk together the eggs and sugar. Mix in the buttermilk, vanilla and oil. Stir in the flour, baking soda, baking powder and salt until just combined.
  2. Pour 3-4 tablespoons oil in a small cup and keep near the stove. You'll need a pastry brush or paper towel to rub oil into the pan between batches.
  3. Preheat an ebelskiver pan over medium heat for 4-5 minutes until hot (the batter should sizzle when poured into the pan - but take care it isn't so hot to burn the ebelskivers). Brush each cup with a tiny bit of oil.
  4. Pour enough batter into each cup to fill about 3/4 of the way. If you are planning on adding a filling (like fruit/jam, etc.) don't fill quite as full. Let the ebelskivers cook for a minute or so until tiny bubbles begin to show on the surface and the edges look like they are setting a bit. Add any filling to the center of the batter at this point and top with a tiny bit of batter to cover.
  5. Using a long, thin tool (chopsticks work well), push the tip into the middle of the batter to the bottom of the cup and gently lift the ebelskiver so that it turns and the cooked part is lifted out of the pan. The uncooked batter will run into the bottom of the cup.
  6. Let the ebelskiver cook a bit more (it will depend on how hot your pan is - don't let them burn!) and turn again, slightly twisting so the seam from the first turn lifts out of the cup, with the needle so that it begins to form a ball shape. If the cooking process seems confusing, just simply keep turning the ebelskiver so it doesn't burn and so that it cooks evenly on each side.
  7. Again, let it cook for a minute and then turn again so the opening is now on the bottom of the hot pan to cook all the way through.
  8. I like to toss the cooked ebelskivers in a 9X13 pan and keep them in a warm oven (about 175 degrees or so) until they are all cooked. Serve warm with any variety of toppings: syrup, fruit and whipped cream, nutella, powdered sugar, jam. The options are endless!

Wednesday, December 11, 2013

sweet stuff OR Vanilla Buttermilk Syrup

I used to love the store-bought, butter flavored syrup.  I'd load up my short stack and scoff as my dad would pour on just a few tablespoons of pure maple syrup onto his pancakes. 

As I've had less and less sugar in my diet, I've found that the commercial syrup is just simply too sweet.  Plus, it seems to have this chemical-ish aftertaste that I just don't enjoy.  Suddenly, I've developed a taste for that real maple flavor.  Don't get me wrong, maple syrup is still sweet.  But this seems to be a real sweetness.  When you use the good stuff, you don't need as much to pack the same flavor punch. 

Another favorite, and breakfast standby at our house, is Vanilla Buttermilk Syrup.  It comes together while you are flipping pancakes or baking waffles and tastes oh, so much better than that store-bought stuff. No, it's not low-fat, or even low sugar- but with the tangy buttermilk and sweet vanilla flavor- you don't need much to make your waffles taste like heaven!

Vanilla Buttermilk Syrup

1 cup sugar
1/2 cup buttermilk
1 cube butter
1/2 tsp soda
1 tsp vanilla

Mix sugar, buttermilk, butter and soda in saucepan; boil for 1 minute.  Take off the heat and add vanilla.  Stir to combine.  Enjoy!

Tuesday, December 10, 2013

a tasty experiment OR pumpkin waffles

I was in the mood for waffles.

I like to make a double batch and freeze some to pop in the toaster in the morning.  My very own, delicious Eggos, if you will.  But, I was in the mood for something different...pumpkin.  In October, there seems to be an influx of pumpkin recipes everywhere.  But pumpkin is good anytime.  I love the earthy flavor and creamy texture, especially in baked goods. 

So I thought I would just make my regular waffle recipe and add pumpkin.  Moral of the story:  that doesn't work.  After doctoring the batter for a half hour, I finally tossed the whole yucky mess and started fresh.  A little searching and some more experimenting- this recipe rose to the top.
This batter is simple and comes together in a flash.  The finished crispy waffles are wonderful with a drizzle of maple or vanilla syrup.  My girls like them best sprinkled with mini chocolate chips.

 (While the waffles are cooking, don't forget to make that vanilla syrup!  I'll post the recipe soon!)

To freeze, let the waffles cool completely.  Stack waffles with a piece of waxed paper in between each one.  Place in a freezer zip-top bag.  To heat, just pop in your toaster until golden and warmed through.


Pumpkin Waffles

Combine dry:
2 cups flour
1/2 cup sugar
1 Tb baking powder
1 tsp cinnamon
1 tsp nutmeg
1/2 tsp salt

Combine wet:
2 eggs
1 1/2 cup milk
4 Tb melted butter
1/2 cup canned pumpkin

Add wet to dry mixture and combine.  Pour onto a hot waffle iron and bake until crispy and golden.

Saturday, December 7, 2013

sunday afternoon OR Jason's breadsticks

Sometimes there is a magical Sunday afternoon when my husband is home.  I can tell that it's going to be an extra special afternoon if he mentions, "I'm in the mood for breadsticks." 

Here's the scoop:  Jason doesn't have time to cook much, but when he does- be ready for awesomeness.  His breadsticks are heavenly. 


To begin, he turns on some music and dons an apron.  When he starts pulling salt and flour down from the cupboards, the girls figure out that something amazing is about to happen and pull their stools over to the counter so they can "help daddy."  He mixes and rolls and sprinkles.  While everything is rising, our family takes to the living room to dance to daddy's music.  This usually turns into either a twirling contest or a tickle fight.  Dad wins.  

Then the breadsticks bake up and we win.  The girls like their buttery parmesean coated fingers and ask for just one more before dinner.  I say, "This is dinner!" and we eat the whole pan.

Like I said, a magical Sunday afternoon.


Jason's Breadsticks

1 pkg. yeast
1 1/2 cup warm water
1 Tbsp. honey
1 tsp. salt
about 3-4 cups flour
melted butter
Parmesean cheese

Dissolve yeast in the water.  Add honey and salt: mix.  Add flour to the right consistency.  Knead a few mi ntues.  Pull of pieces and roll to look like sticks.  Roll to about the size of a woman's thumb.  Place on a greased cookie sheet.  Brush melted butter on top of sticks.  Sprinkle cheese on top.  Allow to rise, covered, for 30 minutes.  Bake at 400 for 10-15 minutes.

Wednesday, December 4, 2013

Brynn's Specialty OR Paper Bag Apple Pie

My sister Brynn is an excellent baker.  Her confection of choice?  Pie.  

 She has perfected the crust making, made the fillings the most delicious and bakes them golden brown.  I have her recipes, but I somehow cannot replicate the perfection that she achieves.  Brynn always makes the pies for Thanksgiving and this year was no different.  I enjoyed a slice of each kind, topped with soft whipped cream.  It was Thanksgiving, after all.  Many different pies have been perfected by her- but the apple is always one of my favorites.
 
I happened to have a few apples left from my produce basket last week and decided that a pie was in order.  One pie that I have got down pat is our family's Paper Bag Apple Pie.  A yummage pat-in-the-pan crust, simple apple filling and a crumble topping- then baked in a paper bag!  You really should let it cool before slicing, but I can never wait.  The girls and I cut a generous slice to share with a cold glass of milk.  Hot apple pie on a cold afternoon- could life get any better?

PAPER BAG APPLE PIE

Crust:
1 1/2 cup flour
1 tsp. salt
1 1/2 tsp. sugar
1/2 cup oil
2 Tbs. milk

Combine: pat into pie plate.

Filling:
5 cups sliced apples
2 Tbs. flour
1/2 tsp. nutmeg
1/2 tsp. cinnamon

Mix together; pour into crust.

Topping:
1/2 cup sugar
1/2 cup flour
1/2 cup chilled butter

Mix until crumbly; sprinkle over the top.
Place the pie in a brown paper bag and close with paper clips.  I like to put mine on a baking sheet for transferring into the oven.  Bake 1 1/2 hours at 350.

Sunday, October 6, 2013

i know for sure it's fall OR applesauce

This is what my kitchen looked like this weekend:


Awesome, right?

I know it's fall when my house smells like sweet apples and cinnamon.  My kids and I went to our kind neighbors house and picked and picked and picked apples this week.  The snappy fall air and the bright colored apples got me thinking of all my favorite apple treats.  Applesauce is high on the list.  It's always been a hit at our house, and my girls love to have it warm as a fall afternoon snack.  This is a simple recipe that can be easily doubled.


Enjoy a few of my favorite apple recipes this week!

Bryttin's Easy Applesauce

8-10 apples, cored, peeled and sliced
1 cup water
1 tsp. lemon juice
1/3 cup sugar
1 Tb. cinnamon

Place all ingredients into a large pot set on medium high heat.  Stir well to combine and stir every few minutes.  Let apples soften completely, about 10 minutes.  Using your immersion stick blender, blend smooth.  (Don't have one?  Ladle into your blender and blend in batches- making sure to vent the lid.  Or just mash with a potato masher for chunky sauce.)  Eat warm!  Or ladle into jars to can or store in the fridge.

Saturday, September 28, 2013

a classic OR spiced zucchini bread

I think quick breads are the Little Women of baking. 
They are just classics.
Banana bread and applesauce bread are two of our favorites.  And this time of year, we slip into this delicious fall Spiced Zucchini Bread.  I love the smell of the cinnamon, cloves and allspice warming my kitchen as this bread bakes.  The flecks of green look lovely in this sweet bread.  Bonus:  it freezes beautifully. 


I let it cool completely then wrap it in plastic and then foil.  Don't forget to label!  There is nothing better than pulling out a loaf of this yummage bread in mid-February and enjoying it warm, slathered in butter.  Make a few extra loaves this fall!


Spiced Zucchini Bread
from Bryttin
makes 2 loaves

3 cups shredded zucchini
1 2/3 cups sugar
2/3 cup vegetable oil
2 tsp. vanilla
4 large eggs
3 1/2 cups flour
2 tsp. baking soda
1/2 tsp baking powder
1 tsp. salt
1 Tb. cinnamon
1 tsp. cloves
1 tsp. allspice
1 tsp. nutmeg
1/2 cup chopped nuts (optional)

- Heat oven to 350.  Grease the bottom of two loaf pans.
- Mix zucchini, sugar, oil, vanilla and eggs in a large bowl until smooth.  Stir in remaining ingredients.  Add nuts, if using.
- Divide batter into pans and bake for 50-60 minutes or until a toothpick comes out clean.  Cool 10 minutes on a wire rack.
- Loosen sides and turn out loaves to cool completely before freezing.  Otherwise, slice and eat warm!

Wednesday, September 25, 2013

chocolate cake for breakfast! OR the best chocolate zucchini bread

Growing up, my siblings and I loved listening to Bill Cosby's standup routines on tape. 
One of our favorite bits he did was the "dad lets us eat chocolate cake for breakfast".  He tells how his kids begged for chocolate cake for breakfast.  As he thought through the ingredient list: 
Milk!  Health food!
Flour!  Health food!
Eggs!  Healthy!
So he sliced off a piece for each of his kids and watched their happy faces as they ate chocolate cake for breakfast.  "Dad is great....gives us the chocolate cake" the kids sang. 


This is that cake. 
I like to call it "bread" so we can eat it just about anytime!
It's moist, chocolatey and super yummage. 
And healthy!  That's right. 
Just look at the ingredient list: 
Flour!  Healthy!
Eggs!  Health food!
Zucchini!  Vegetable!

We eat this warm for breakfast and also for dessert with a dollop of whipped cream.

Chocolate Zucchini Bread {makes 2 loaves}
Recipe by Our Best Bites

2 C flour
2 t cinnamon
1/2 t salt
1 1/2 t baking soda
6 T unsweetened cocoa powder
1/2 C canola oil
1 C sugar
1/4 C brown sugar
3 eggs
2 t vanilla
1/2 C sour cream
3 C grated zucchini
3/4 C mini chocolate chips
optional: zest from one orange
Topping:
2 T brown sugar
2 T white sugar
1/2 t cinnamon
Preheat oven to 350 degrees. Butter and flour 2 loaf pans and set aside. Mix topping ingredients in a small bowl and set aside.
Place flour, cinnamon, baking soda, salt, and cocoa powder in a small bowl and whisk to combine. Set aside.With a stand or hand mixer beat oil, white sugar, brown sugar, and eggs until combined and slightly fluffy, 1-2 minutes.
Add vanilla and sour cream and mix until combined.
Gently stir in the grated zucchini (and zest if you’re using).Take a spoonful of the flour mixture and stir in with the chocolate chips (that will help keep them evenly distributed.)Add the remaining flour mixture to the batter and stir just until combined. Add chocolate chips and stir to combine.
Divide the batter between the two pans. and sprinkle topping over each. Place pans on a cookie sheet for easy moving.  Bake in your preheated 350 degree oven for 50-60 minutes. I set my timer for 45 minutes and then keep an eye on it for the remainder. Ya never know how different ovens handle things.
When it’s done a toothpick or skewer should come out without goopy batter on it and the top will be gorgeous and cracked with sugar.  Let it cool on a rack for 5-10 minutes and then remove from pans.

Sunday, September 22, 2013

storing up for the winter OR zucchini bread

It seems to happen every year. 


That big green veggie comes into my kitchen by the armful.  Friendly neighbors sharing their garden's bounty with me.  I love squash, especially zucchini.  But September seems to overload my system.  That's why shredding it up and making a few breads to stick in the freezer always seems to happen at the time of year, too.  I'll be sharing a few of my favorite zucchini bread recipes over the next few days.

My preschooler helped me shred big green chunks of squash on the box grater as we listened to music and danced in the kitchen.  She's getting so big.  I sometimes wish I could just freeze her at this age right along with my zucchini bread!  We made a double batch of everything and still had squash leftover.  Looks like another baking/dancing day is in order at my house. 

I found this delicious cornbread on Pinterest and have ended up loving this blog, Mostly Foodstuffs.  She has lots of yummage recipes- check it out!


Brown Butter Zucchini Cornbread

from Bon Appetit, via Epicurious
yields 1 loaf


1 good-sized zucchini (about 12 ounces)
1 cup flour
1/2 cup whole wheat pastry flour (or just use additional flour)
1 teaspoon baking powder
1 teaspoon baking soda
1 teaspoon coarse salt
3/4 cup medium-grind cornmeal (standard cornmeal would work fine)
1/2 cup (1 stick) unsalted butter, plus additional for greasing pan
1/2 cup buttermilk
2 large eggs
1/3 cup sugar, plus additional coarse sugar for sanding the top

Preheat your to 350° Fahrenheit. Butter and flour a loaf pan, and set aside.
Trim the ends off the zucchini, and slice a half-dozen whisper-thin slices off to reserve as garnish. Grate the remaining zucchini on the coarse holes of a grater, then set aside in a colander to drain while you prepare the rest of the recipe.
In a large bowl, sift together the flours, baking powder, baking soda, salt and cornmeal. Set aside.
Melt the butter in a small saucepan over medium-high heat. Continue cooking until butter solids at bottom of pan turn golden brown, about 3 minutes, then pour out into a medium bowl. Let cool slightly, then pour in the buttermilk, whisking to help cool the butter and take the chill off the buttermilk. Add the eggs and sugar, and whisk well to combine. Give the zucchini a quick press in the colander to release any liquid, and stir into the bowl as well.
Gently fold the dry mixture into the zucchini mixture, stirring until *just* combined (the mixture will be quite thick). Pour into your prepared pan, and smooth the top. Gently lay the reserved zucchini slices in a row down the top, then sprinkle generously with coarse sugar. Bake until golden and a tester comes out clean, ~45 minutes to an hour. Let cool in pan for 15 minutes, then turn out onto a rack and cool fully before slicing.

Monday, August 19, 2013

it's hot outside OR simple slowcooker supper

It's summer and man, it's HOT!

I never love turning on my oven, or even my stovetop in the heat.  We do grill quite a bit out on the deck, but sometimes it's nice to have everything done right inside my cool, air-conditioned kitchen!  So as a quick dinner we have slow cooker meals quite often in the summer.  This is one of our favorites and an easy one to add to your dinner rotation.

Slow Cooker Pineapple Pulled Pork

1 large package country-style boneless pork ribs
1/2 bottle of your favorite BBQ sauce
1 can of pineapple tidbits


Combine in your slow cooker on Low 6-8 hours.  Shred with a fork, when tender, and serve on slider buns with a slice of pineapple on top.  To make this truly decadent, we grill pineapple spears to go along side with a mound of coleslaw- yummage!

Friday, July 12, 2013

do oranges last in the fridge? OR how to store produce

My good friend Brandon is a produce man. 


Really.

He works in produce for a living.  Started off in a grocery store and has worked his way up to a major food company produce buyer.  So when Brandon starts talking produce, I listen.

Sometimes it's an offhand remark when he open's my fridge, "You know putting citrus in here will make it mealy."  Or a funny story about debunking an old wives tale on how to choose watermelon.  (For the record, don't look for bee stings.  There are no kamakazi bees dying for the sake of ripe melon.)  Often it's when we are both in the kitchen, while our spouses sit on the barstools keeping us company while we cook.  He mentions how to care for avocados or the best way to keep lettuce crisp.  Since I have bought a share of a farm this summer (my local CSA!), I am flush with produce.  I love seeing the new and sometimes unusual items in my box each week.  And I'm glad I have Brandon to tell me how to store, wash and cook most of it!

I found this handy graphic at DrKehres.com and posted it on my fridge as a reminder.


Tuesday, July 9, 2013

only in Montana OR fresh pasta

There are a few special dishes that families only make once a year.  Sometimes they are so time intensive that it may be impractical to make the dish more often.  Some things are associated with specific holidays or celebrations.  Some dishes may just seem out of place if they are made anywhere else or at any other time.

Fresh pasta is that way for me.

Rolling out pasta dough on the oversized well-worn bread board at our cabin in Montana is how you make pasta.  Grammy and I mix the eggs and flour in the butter-yellow pyrex bowl that has been there since the fifties.  Then we dump the floury, shaggy dough onto the board and knead it until it is smooth and elastic. We laugh and talk and take turns with the rolling pin when our arms give out.   After slicing the pasta thin with a pizza cutter, we let it dry out on the board.  Usually, our noodles get tossed into a massive pot of turkey noodle soup. 


Oh, I've made pasta plenty of times at home.   My husband loves it!  My kids like helping me mix the dough.  I have a nifty pasta roller that clicks on the counter and my girls help me churn.  I have tried several different recipes and we even make filled pasta sometimes. 

But to me, the real way to make pasta is in Montana on my great-grandma's bread board.


Fresh Pasta
by Mario Batali

3 1/2 cups all purpose flour
4 eggs

Mound the flour in the center of a large wooden cutting board. Make a well in the middle of the flour, add the eggs. Using a fork, beat together the eggs and begin to incorporate the flour starting with the inner rim of the well. As you incorporate the eggs, keep pushing the flour up to retain the well shape (do not worry if it looks messy). The dough will come together in a shaggy mass when about half of the flour is incorporated.

Start kneading the dough with both hands, primarily using the palms of your hands. Add more flour, in 1/2-cup increments, if the dough is too sticky. Once the dough is a cohesive mass, remove the dough from the board and scrape up any left over dry bits. Lightly flour the board and continue kneading for 3 more minutes. The dough should be elastic and a little sticky. Continue to knead for another 3 minutes, remembering to dust your board with flour when necessary. Wrap the dough in plastic wrap and set aside for 20 minutes at room temperature. Roll and form as desired.

Note: Do not skip the kneading or resting portion of this recipe, they are essential for a light pasta.


Friday, July 5, 2013

snack happy OR the best graham crackers

It's no secret that my kiddos are pretty great eaters.  I am always pleased when they both try sushi or ask for more cauliflower.  They adore artichokes and love lettuce.  One of their favorite meals is our grilled skirt steak!  I know I'm lucky to have such wonderful eaters.  There is only one drawback.  They seem to be constantly hungry.

 Maybe not constantly, but every few hours they want to eat again!
 
I've made a little snack box in the fridge I keep stocked with small jars of yogurt, string cheese, cucumbers and dip, sliced apples and bags of grapes.  I have a basket in the pantry with applesauce cups, bags of crackers, jars of dried fruit and jerky.  There is even a spot in the freezer with a few frozen goodies just for them!  But the one snack that really makes the girls happy? 

Good old fashioned graham crackers. 
They like to spread peanut butter or Nutella on them. 
Eat them with apple slices. 
S'mores don't seem complete without them. 
And since they are so simple, and delicious, I don't mind making a few batches at a time.  I hope your little snackers love these as much as mine.


The Best Homemade Graham Crackers
from The Homemade Pantry, by Alana Chernila

Makes 45 to 50 2 x 3-inch crackers

1 cup all-purpose flour
¾ cup whole wheat flour
½ cup rye flour, plus additional for the counter  (I use oat flour)
½  teaspoon salt
¼  teaspoon baking soda
½  teaspoon baking powder
1 ½ teaspoons ground cinnamon
¼ cup packed dark brown sugar
3 tablespoons cold unsalted butter, cut into 1-inch cubes
4 tablespoons shortening, cut into 1-inch cubes
4 tablespoons honey
2 teaspoons vanilla extract
1 teaspoon granulated sugar

1. In the bowl of a stand mixer, combine the flours with the salt, baking soda, baking powder, 1 teaspoon of the cinnamon, and the brown sugar. Mix for 10 seconds using the paddle attachment, then add the butter and shortening. Mix on medium speed for 30 seconds.

2. Combine the honey and vanilla with ¼ cup cold water in a liquid measuring cup and stir to combine until the honey is mostly dissolved. With the mixer running on medium- low speed, slowly pour the honey mixture into the bowl, giving the mixture time to absorb the liquid. Continue to mix for another 20 seconds, or until the dough comes together. It will still be slightly crumbly. Push the dough into a ball, wrap it in waxed paper, and refrigerate for at least 2 hours, and up to 3 days. (The dough can be wrapped and frozen at this point.)

3. Take the dough out of the refrigerator about 20 minutes before you are ready to bake. Preheat the oven to 350°F. Cut the dough in half, and lay one half between two sheets of waxed paper dusted with rye flour. Roll the dough as thin as you can get it, ideally 1⁄8 inch. It will still be slightly crumbly, but just press it back together and keep rolling. Use your pizza wheel, crinkle cutter, or knife to cut 2 × 3-inch rectangles. Use a spatula to separate the rectangles from the waxed paper and set them on an ungreased baking sheet. The crackers won’t spread, so they can be quite close. Reroll any scraps and repeat—then repeat again with the second half of the dough.

4.  In the small bowl, combine the remaining ½ teaspoon cinnamon with the granulated sugar. Sprinkle the crackers with the cinnamon mixture and prick the dough several times with a fork. Bake for 15 minutes, or until just starting to brown at the edges. Cool on a wire rack. The crackers are great out of the oven, but their flavor and texture improves the next day.

Store at room temperature in a covered container for up to 10 days. You can keep unbaked dough wrapped in wax paper in the fridge for three days before baking. In the freezer, dough can be wrapped in plastic and placed in a freezer bag for four months; or, freeze baked crackers for four months in a freezer bag.

Tuesday, July 2, 2013

the drip catcher idea OR popsicles

My girls love popsicles.  Any flavor, any shape. 

Our freezer is on the bottom, so from a young age- the girls have been able to open the frosty door and check out all the goodness inside.  I have a shelf devoted to all their chilly treats right inside the door.  A few favorites include frozen grapes, little dollops of yogurt and homemade popsicles.  They sit out on our back deck under the umbrella with red or purple sticky streaks running down their arms.  Then they "wash" in the kiddie pool on the lawn and really soak in what it means to be a kid in the summertime. 


After several stained favorite shirts, they asked for a "drip catcher" solution.  Mine?  Buy pink, yes- they must be pink, paper muffin cups.  Cut a small slit in the bottom.  Slide the popsicle stick in and enjoy a dripless treat!

Oh yes, I occasionally buy the fancy kind of pops from the store.  The one's with shapes or lots of colors, but the girls get such a kick out of helping me make popsicles- I stock up on molds and we let our imaginations run wild!  Here are two of our favorites.

Nutella Fudgesicles

1 1/2 cups chocolate milk
1/2 cup Nutella

1.  Whisk ingredients thoroughly- I use my blender.  Chill for one hour.
2.  Pour  chocolate goodness into popsicle molds, leaving a slight headspace for freezing.  Freeze until solid. 


Mango-Peach Yogurt Pops

2 ripe mangos, chopped
2 ripe peaches, peeled and chopped  (I use my bottled peaches)
1 1/2 cups plain yogurt  (We like greek)
1/2 cup milk

1.  Blend ingredients until smooth in the blender.
2.  Pour into popsicle molds and freeze until solid.  

Sunday, June 30, 2013

summertime OR salad in a jar

Hello again.  It's been a while.

It's that time of year.  The sun is out.  The kids are swimming in the back yard every day.  Sprinklers are sprinkling the grass.  Popsicles are dripping down our arms.  Vacations to the forest seem to happen more often.  Ahh, summertime.  I love this time of year.

In the summer, meals take on a lazy-dazy feel.  We grill.  We skewer lots of things.  We make smoothies.  We seem to wrap everything in a tortilla.  And we eat salad.  Delicious salads of all sorts make their appearance on our table.  In my CSA basket, we've been getting fresh greens every week.  We've also tried out a few new foods:  garlic scapes, radish pods, breakfast radishes.  But our favorite discovery are microgreens.  These flavorful little greens spice up our salads and both my husband and I miss a salad without them now!  Keep your eyes out at the supermarket or farmer's market for those little green bites...you'll never go back! 

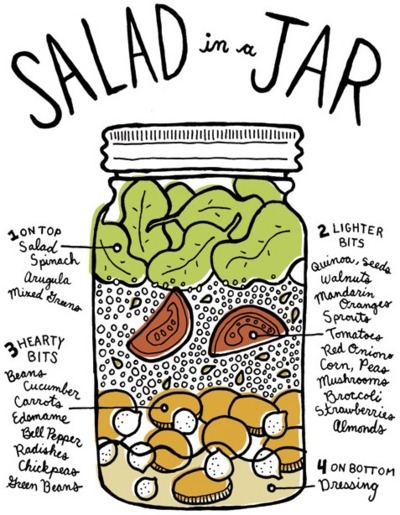
And to use up all these delicious new flavors- salad in a jar.  I make several of these beauties on Monday and they last us for lunches for about 4 days or so.  In a pinch, I've even emptied the prepared ingredients into a bowl for dinner, too!  I love seeing my mason jars lined up in the fridge with all my goodies from my CSA share just waiting to be savored.


Thursday, May 2, 2013

my staple breakfast OR mango coconut smoothie

I had never had coconut milk until about 4 months ago.  I sort of pigeonholed it as some odd boxed drink for those cursed with lactose intolerance.  Oh yes, I made coconut rice or coconut cake occasionally. But it was always just an ingredient.

Now- I drink it every day!

The past few months have been chock full of changes in our family's diet.  Lucky for us, coconut milk is now a part of our mornings.  Smoothies have always been a favorite around here. We love the sweet pineapple in this one. Some mornings, if I am feeling extra healthy, I make it "green" with a few handfuls of spinach. Enjoy!

Mango Coconut Smoothie
serves 1-2, depending on thirst :)

1/2 cup frozen or fresh mango
1/4 cup frozen pineapple
coconut milk- some. Maybe 1/2 cup or so-ish.

Combine the fruit in the blender, add two splashes of milk. Blend on high, streaming in coconut milk until well blended and at the desired consistency. (We like ours thick, like a milkshake.)

Monday, April 8, 2013

spicy diet OR asian beef lettuce wraps

I've been doing this wild diet.

Lots of fresh veggies and fruit- which I usually love.  But I can only handle salads for lunch every day for a limited amount of time before I get bored.  I am used to making the grain the star of the show at dinner- but since I'm abstaining for a season- it's hard for me to make veggies full of that same flavor.  Truthfully, speed and ease is also an issue.  I like to be able to make dinner in about 30-45 minutes...sometimes to really inject some oomph into veg it takes a bit longer.  The food I've been making is yummy, but has not had as much flavor as I am wishing for. 
I've added fresh herbs. 
Lots of citrus. 
Tried eating raw.  Or with a reduced sauce.
But nothing seems to quench that burst of flavor I've been wanting. 

Then I found this recipe and decided to try it for dinner one night.  The heat, the spice, the crunch.  Everything came together perfectly.  Kismet.  My tastebuds were screaming for more!  I made another batch and secreted it into the back of the fridge to save exclusively for my lunches for the next few days.  Selfish?  Maybe- but also necessary. 

This wonderful recipe taught me the value of chili garlic paste and how a little spice can actually make "diet food" super delicious.

ASIAN BEEF LETTUCE WRAPS
from The Comfort of Cooking

Yield: Serves 4 (3 wraps each)

Ingredients:

12 leaves lettuce (iceberg, romaine, Boston or green leaf)
1 tablespoon vegetable oil
1 red bell pepper, seeded and diced
1 yellow onion, diced
1 lb. ground beef
1/4 tsp. each salt and pepper
2 garlic cloves, minced
1 tablespoon soy sauce
1/4 cup hoisin sauce
1-2 Tbsp. chili sauce *
1 teaspoon ground ginger
1 tablespoon rice wine vinegar
4 green onions, chopped

Directions:

Gently rinse lettuce leaves and pat dry, careful not to tear them. Set aside.
In a large nonstick skillet, heat oil over high heat. Add bell pepper and onion, cook 3 minutes. Add ground beef and cook 5 minutes, breaking up with a wooden spoon. Drain grease and return pan to stovetop; reduce heat to medium. Season with salt and pepper. Stir in garlic, soy sauce, hoisin and chili sauces, ginger, rice vinegar and honey. Cook until sauce has thickened, 3-4 minutes. Stir in green onions.
Spoon meat mixture into a medium bowl and place on a large serving platter. Arrange lettuce leaves around the bowl and serve.
Enjoy!
* This is a thick red paste with medium-high spice, made from red chilies, vinegar and salt. It can be found in the Asian or ethnic sections of most grocery stores.  One tablespoon was about my heat limit!